


This article works for the following models of DVRs / POE NVRs / Wireless NVRs:
4-Channel DVRs / POE NVRs / Wireless NVRs:
ZR04ZN; ZR04ZM; ZR04FN; ZR04FM; ZR04CN; ZR04CM; ZR04JS; ZR04TS; ZR04TN
ZR04RN; ZR04RM; ZR04EN; ZR04EM;
ZR04DS; ZR04MS;
8-Channel DVRs / POE NVRs / Wireless NVRs:
ZR08ZN; ZR08ZM; ZR08FN; ZR08FM; ZR08BN; ZR08BM; ZR08CN; ZR08CM; ZR08KS;; ZR08MN; ZR08MM; ZR08TN
ZR08RN; ZR08RM; ZR08EN; ZR08EM;
ZR08DS; ZR08DP; ZR08MS;
16-Channel DVRs:
ZR16ZK; ZR16JK; ZR16BK; ZR16CK
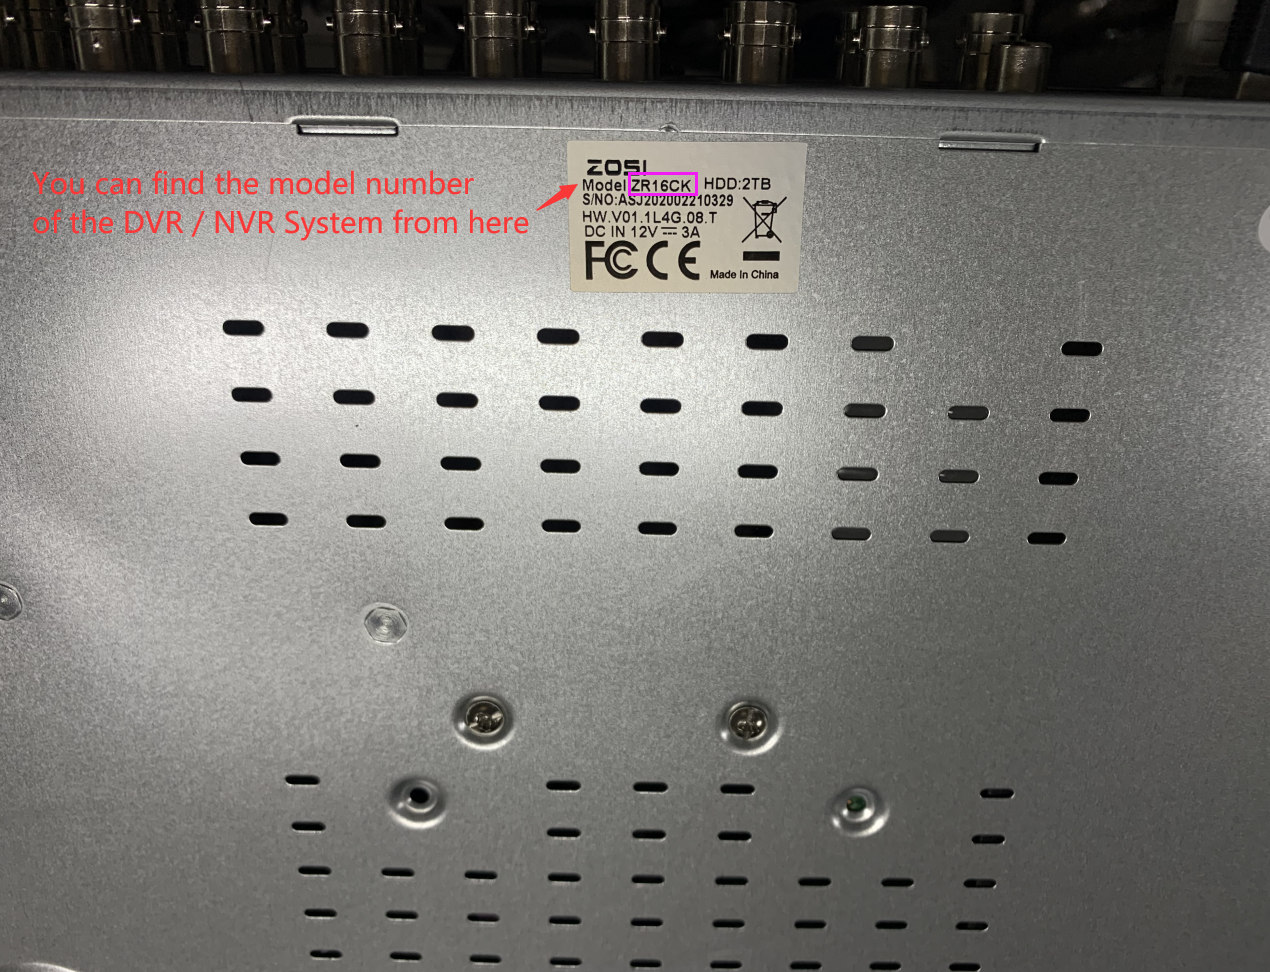
(You can find the model number on the label at the bottom of the DVR.)
1. First, please make sure you have installed an internal hard drive inside your DVR.
Note: 1. Our DVR can't support the external hard drive to record, and without a hard drive, it cannot record and playback.
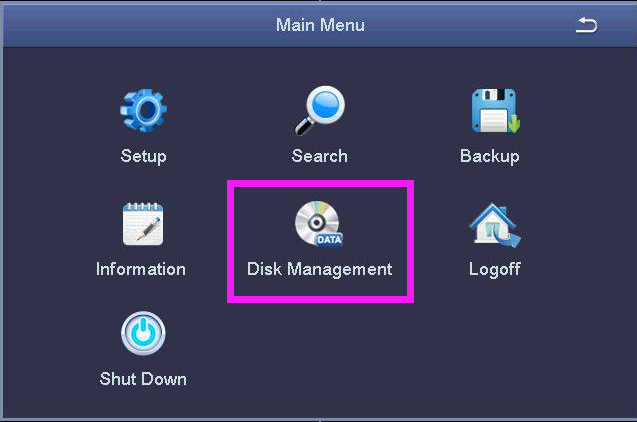
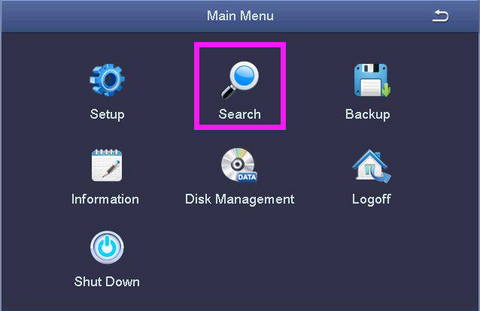
2. Before recording, please go to DVR's Main Menu - Disk Management to format the hard drive.
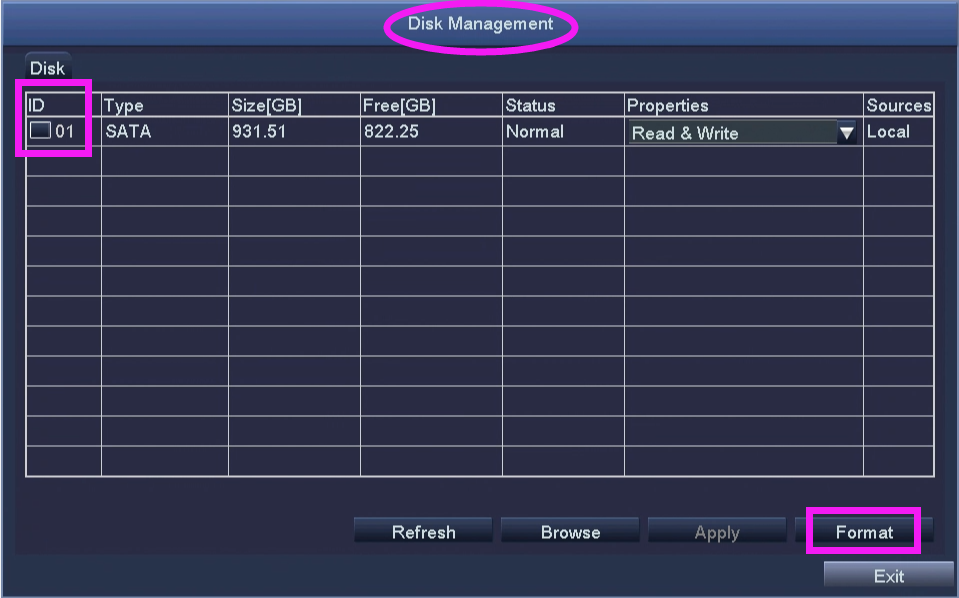
3. Please tick the hard disk's ID, then click "Format" to format the hard drive.
After formatting, please click "Apply" to save the setting.
3. How to Setup Manual Record, Schedule Record and Motion Detection Record?
A. Manual Record
If you want the system to record 24/7, you need to set up the record manually.
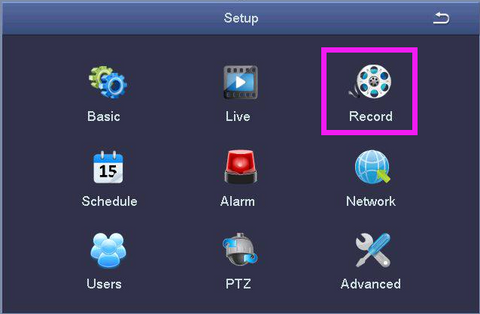
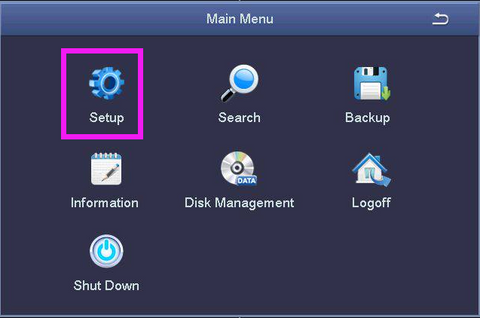
(1). Please go to DVR's Main Menu - Setup - Record to enable the channels you want to record. Then click "Apply" to save the setting.
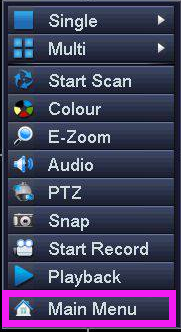


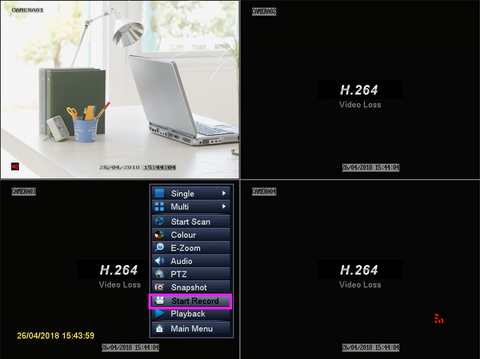
(2). Please return to the main menu, you will find "Start Record" / "Stop Record" button, please select "Start Record", after that, you will find a green icon on the channels you selected to record, the system will record all the time.

B. Schedule Record
If you want to turn off manual recording, and set the timer for Schedule, you can follow up the below steps to set up:
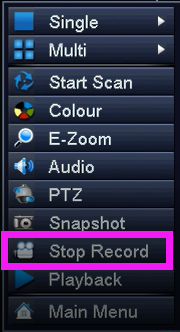
(1). Please go to DVR's menu, click "Stop Record".
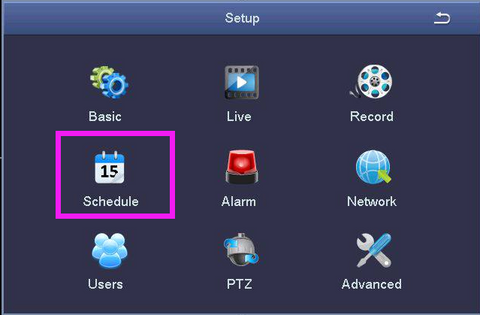
(2). Please go to DVR's Main Menu - Setup - Schedule to set up schedule recording.
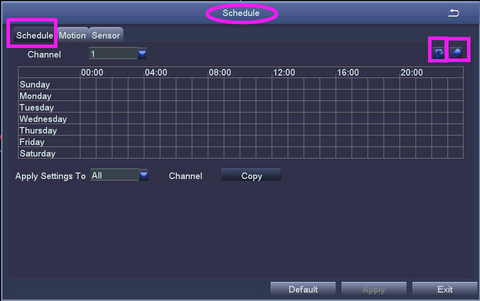
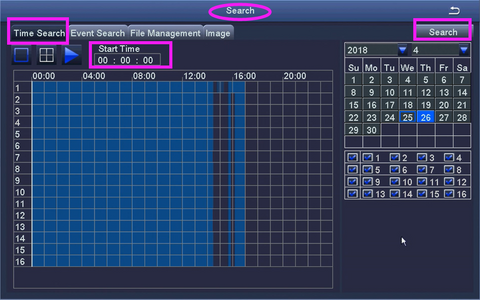
Note: 1. please select the channel you want to set up schedule recording.
2. Set time period:please click  on the upper right corner, then select the corresponding time to click the grid, you will find the grid is covered with blue. The time that is covered by blue is the time of video recording. The
  is to erase the area.
3. If you want another channel to set up the same time period, please select the channel, then click "Copy". After finishing, please click "Apply" to save the setting.
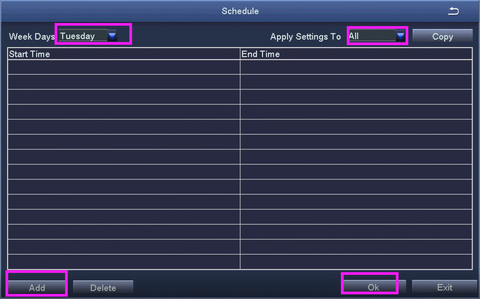
4. Or you can move the mouse arrow to the grid area, then double click the left button on the mouse, you will find the schedule, you can add the time period manually.
After that, you will find a blue icon on the channel when it starts recording.
![]()
C. Motion Detection Record
If you want to turn off manual recording, and leave the DVR to record only when it detects motion, you can follow up the below steps to set up:
(1). Please go to DVR's menu, click "Stop Record".

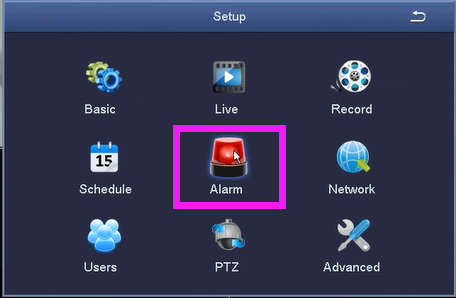
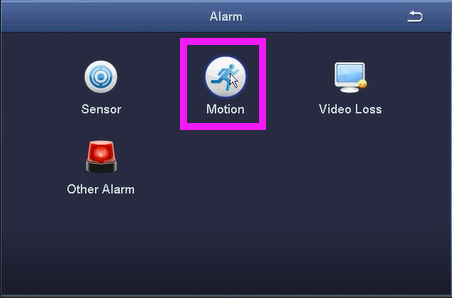
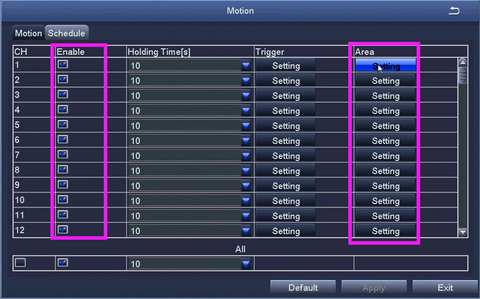
(2). Please go to DVR's Main Menu - Setup - Alarm - Motion Detection to enable the channel you want to set up motion detection, and edit the area for the channel.

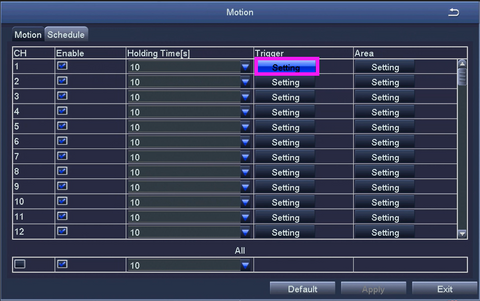
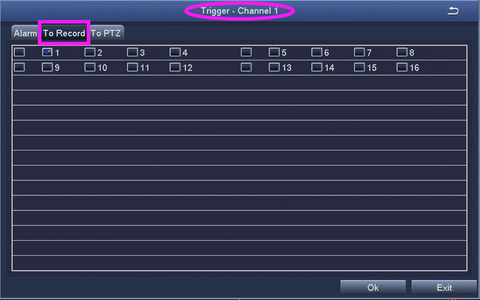
(3). Please go to DVR's Main Menu - Setup - Alarm - Motion - Trigger - To record to check whether you enabled the record.
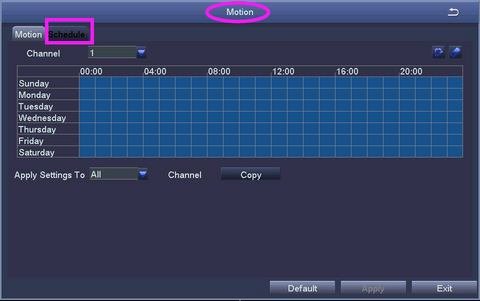
(4). Please go to DVR's Main Menu - Setup - Schedule - Motion to check if all channels were covered with blue. If yes, you needn't change it.
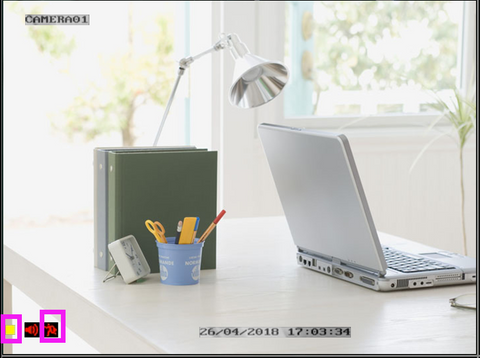
(5). You will find a yellow icon and red man on the channel that you set up to motion detection record.
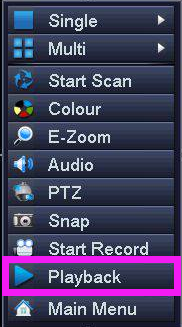
4. Playback
A. You can click "Playback" to play back the recording files directly, but you can't select the specific time to playback.
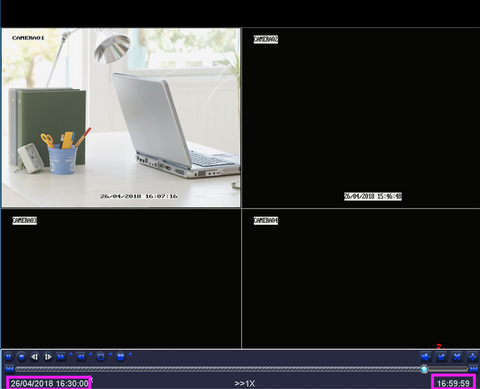
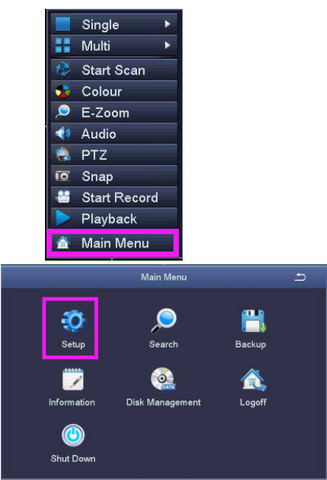
B. You can also go to DVR's Main Menu - Search - Time Search to select the specific time to playback the recording.

Note: 1. " " is to select the channel you want to playback.
2. " " is to select multiple channels to playback at the same
time. But four channels is the maximum.
3. " " is to play the recording files.
Please let us know if you have any questions:
Support Email address: service@zositech.com
Click here to send us a ticket.


